Lafayette CollegeTechnology Help
Getting Started with Lecture Capture
Kaltura Lecture Capture is available on all classroom PCs and provides the ability to record lectures, presentations, or guest speakers with the click of a button directly to your “My Media” library in Moodle.
Getting Started with Lecture Capture
- In order to use Lecture Capture, you must first access your “My Media” library in Moodle.
- Log in to Moodle and choose My Media located in the sidebar menu. This will ensure that your user name is added to the Lecture Capture database.
- Connect a microphone via USB to the computer and ensure that it is turned on. USB microphones and web cameras are available for checkout from Skillman Library. See the library catalog for a complete list of available equipment and search for ‘itech’.
- From the classroom PC, choose the Lecture Capture software either from the desktop or taskbar.
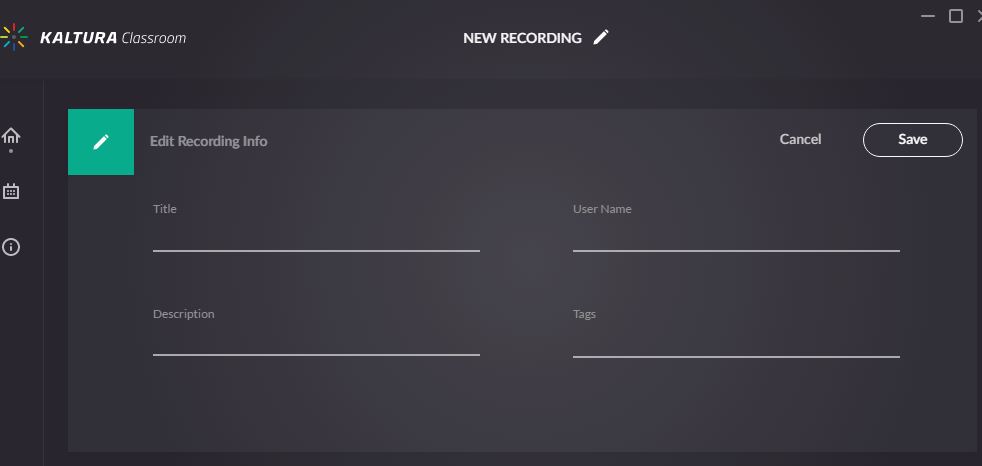
- Set your recording settings by selecting “New Recording” from the top of the screen. Fill in the Title of the recording and your user name (Net ID). You can also add a description and/or tags. [Save]
- The Primary video source is automatically set to record the desktop but this can be changed to a webcam or a webcam can be selected as the Secondary video source.

- Choose the [Start Recording] button. This will initiate a 5 second count down to the start of the recording. When finished, select the [Stop] button. The recording will automatically be saved and uploaded to your “My Media” library on moodle.lafayette.edu where you can then add captions and add as a video resource to your Moodle course(s).
Note: Any recording made using a PowerPoint lecture will automatically generate chapter markers for each slide that easily allow for navigation to different parts of the lecture.

For additional assistance or questions about using Lecture Capture, contact the Help Desk (help@lafayette.edu).