Lafayette CollegeTechnology Help
Landing Page Header Image
Instructions for updating a header photo
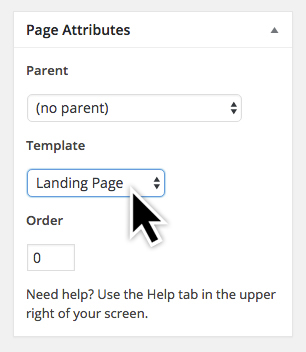
Step 1: Select the Correct Template
In the Page Attributes panel, select the Landing Page template from the template drop-down menu. Leave the other selections as is. The Landing Page template is intended for use only on the departmental homepage and should not be used elsewhere on your site.
STEP 2: Click the [Add Image] Button
In the Department Page Content panel, click the [Add Image] button.
- Make sure all photos are 1440 x 810 px. Anything smaller will not display.
- The page has the ability to adapt to various screen sizes and will crop photos to achieve this. This means that your photo needs to have all “action” centered within the center line, top to bottom, and side to side, of the image.
- See “Choosing a good header photo” below for suggestions on what photo or artwork will work best as a header image.
Choosing a short header image
Select the Short Header option for a shorter header image. This will crop the top of the photo, so make sure you have an image that will work as a short header.
Choosing a good header image
There are several important considerations when it comes to choosing a good header image. Use the image below as a guide to picking the best image.
- Make sure all art or photos are 1440 x 810 pixels. The new WordPress template will not allow smaller images to be placed in the header image component.
- Pick images that have most of the “action” in the middle third of the image, as shown below.
- Be aware that anything within the “danger zone” will be cropped off on different devices. Try to keep all important details out of the danger zone. Be especially aware of cropping heads off or in half.
- Never use a large headshot portrait for your image, as it will crop badly. You will see the nose and crop out the eyes and mouth.
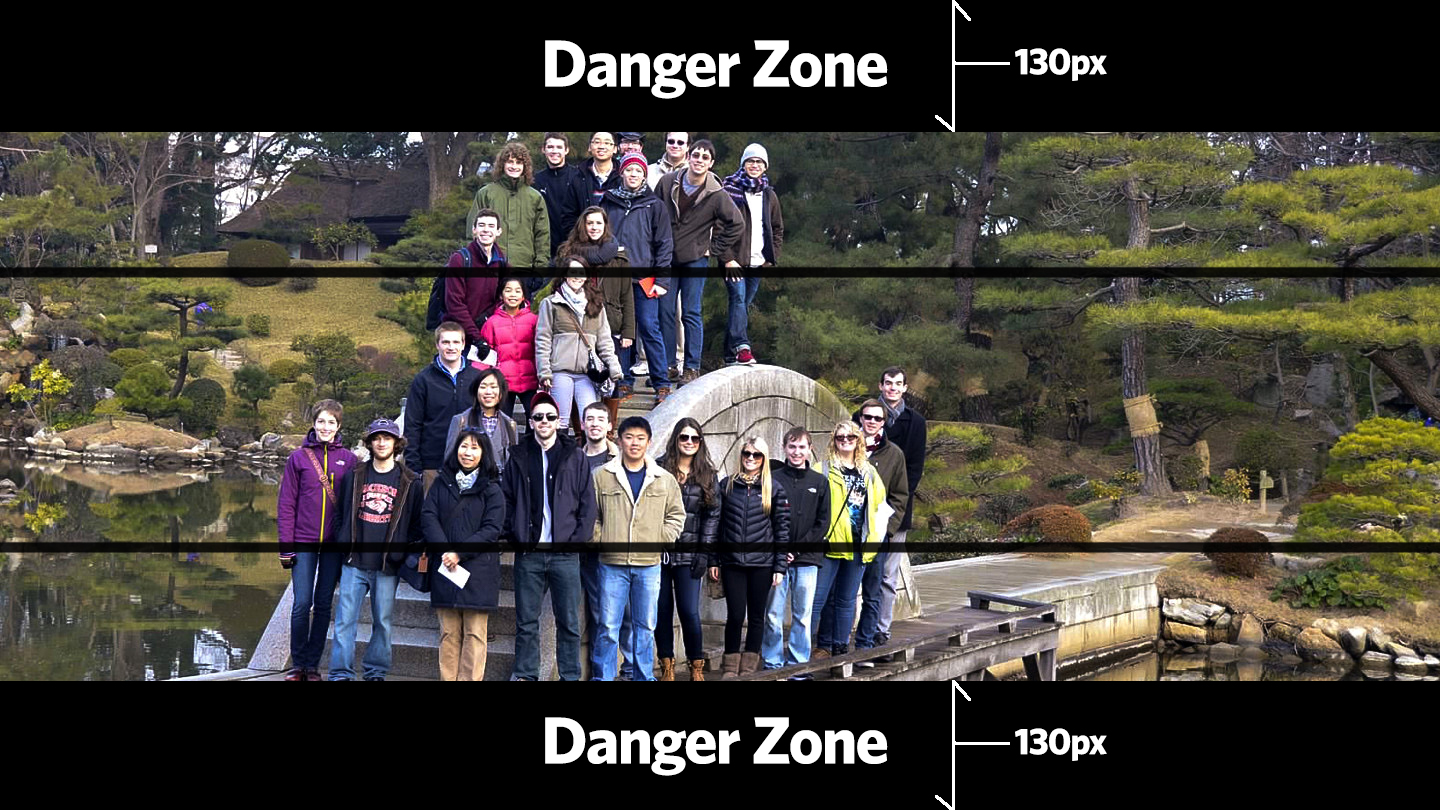
Please note: The above danger zone measurements are based on a 1440 x 810 pixel size.