Lafayette CollegeTechnology Help
Organizing users into Moodle Groups
Manually creating Groups
- On the course page, select the Participants tab.
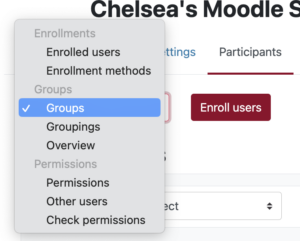
- On the next page, select Groups from the drop-down menu in the upper left.

- Click the [Create group] button.
- Enter a Group name, description, and a group picture if desired.
- Click the [Save changes] button.
- Once returned to the Groups administrative page, select the group from the Groups list and click the [Add/remove users] button.
- Select Potential Members from the right and click the [<Add] button to move them to Group Members on the left.
- Click the [Back to groups] button.
- Repeat this process for each group that needs to be created.
Auto-creating Groups
- On the course page, select the Participants tab.
- On the next page, select Groups from the drop-down menu in the upper left.

- Click the [Auto-create groups] button.
- A naming scheme will automatically be created. (Group A, Group B, Group C…)
- Specify the number of groups and/or how many students are in each group.
- You can also select group members only from pre-existing groups/groupings with the “Select members from group” option.
- Click [Submit].