Lafayette CollegeTechnology Help
Setting Up Google Analytics on Sites.Lafayette.edu
If you wish to measure site data and traffic on your personal Lafayette website hosted on sites.lafayette.edu, we recommend utilizing the Google Analytics for WordPress by MonsterInsights plugin along with a new GA4 property. Once you have a site created and are ready to begin measuring user engagement, the steps below will guide you through the process of setting up a Google Analytics property and integrating it into your site.
Setting up Google Analytics and the MonsterInsights Plugin
Step 1: Ensure That Your Sites.lafayette.edu Site is Public
- Log into your site at sites.lafayette.edu
- Go to Settings > Reading > Site Visibility
- Select “Allow search engines to index this site”
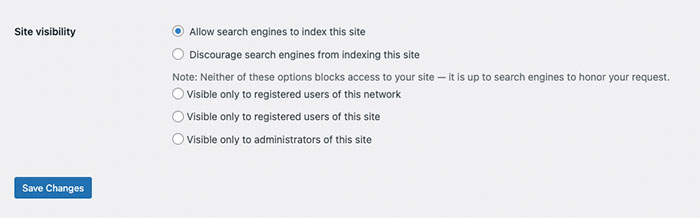
- Click the “Save Changes” button
Step 2: Activate the Google Analytics for WordPress by MonsterInsights Plugin
- In order to activate Google Analytics for WordPress by MonsterInsights, you will need to submit an ITS help ticket to request that the plugin be added to your site. Please provide the URL of your site (e.g. sites.lafayette.edu/yoursite) in the ticket.
- Once it has been confirmed that the plugin has been added, verify that it is ready for setup by clicking on the “Insights” tab in the left-hand menu in the WordPress admin area. You should be taken immediately to a setup screen.
- You do not need to do anything further with the plugin at this time. Ignore the “Launch Setup Wizard” page or any setup messages for now and proceed to the next steps in a different window or tab
Note: If you do not see “Google Analytics for WordPress by MonsterInsights” as an option in your list of available plugins, please contact help@lafayette.edu
Step 3: Create a New Google Analytics Property for Your Site
- Navigate to https://analytics.google.com/ in your browser
- Create a New Account
- If your Google account is already associated with another Google Analytics property or properties, go to Admin > + Create Account
- If this is your first time using Google Analytics, click “Start Measuring”
- Fill out the details on the “Create a Property” screen and the subsequent screens to follow. Insert your property name and select any additional options that apply to your goals and property. Your needs and preferences on the “Account Sharing & Data” and the “Business Objectives” screens may vary. Select the ones that best suit your needs.
- Accept the Google Analytics Terms of Service Agreement
- Under the “Choose a platform” section, select “Web”
- Enter the URL of your website and provide a custom “Stream Name”
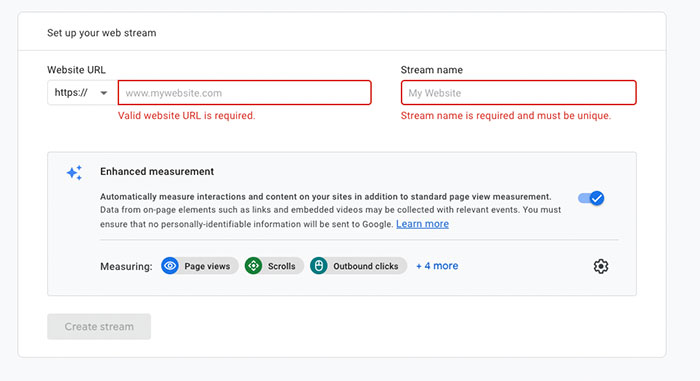
- Click “Create Stream”
- Move onto the “Install Your Google Tag” steps
Step 4: Install Your Google Tag
- Click “View Tag Instructions” at the top of your Google Analytics property menu
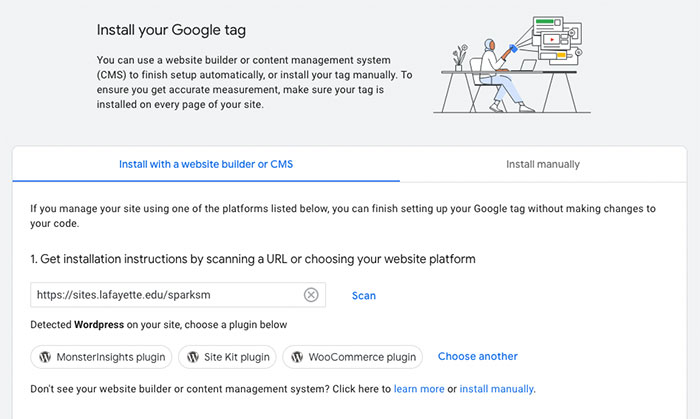
- Select the “Install with a website builder or CMS” tab on the “Install your Google Tag” page.
- If Google Analytics for WordPress by MonsterInsights was successfully installed on your site, it will appear in the list of plugin options on the “Installation instructions” screen
- Select “MonsterInsights plugin”
- A new list of instructions will appear, but you can ignore these instructions and proceed to the next step
- Navigate back to the admin section of your WordPress, click “Insights” in left-hand menu, and select “Launch Setup Wizard“
- Select your type of site
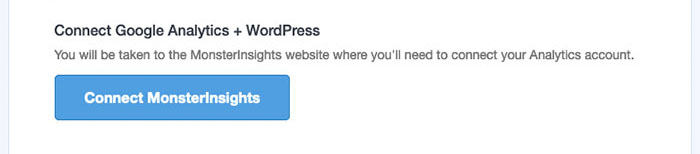
- Select “Connect MonsterInsights” on the next screen
- You will be redirected to a “Sign in with Google” screen
- Select the account associated with your Google Analytics property
- Allow MonsterInsights access to your Google account
- Select the profile created previously for your site and click “Complete Connection”
- DO NOT CLOSE THE WINDOW while the authentication is finalizing
- Review (and modify if necessary) the settings on the next screen, then click “Save and Continue”
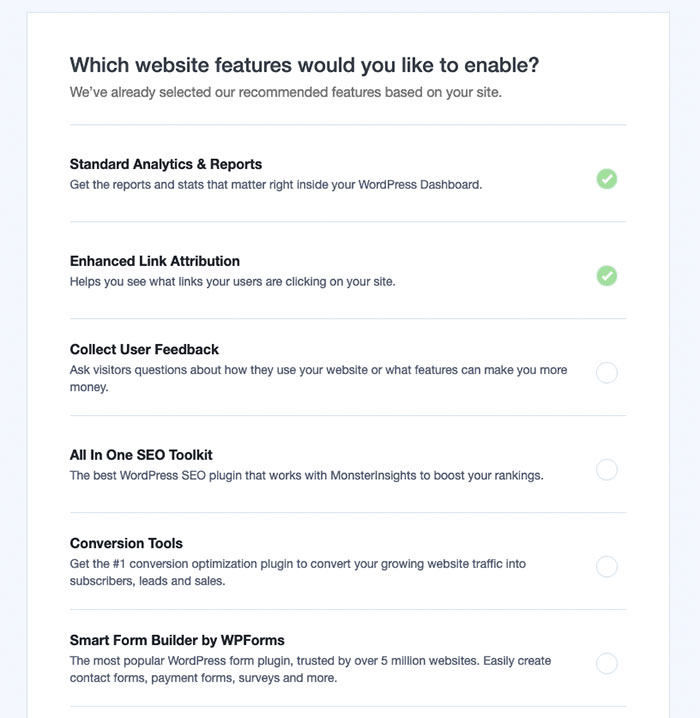
- On the “Which website features would you like to enable?” screen, deselect “Collect User Feedback,” “All In One SEO Toolkit,” “Conversion Tools,” and “Smart Form Builder by WP Forms”
- Select “Continue” or “Skip for Now”
- The final screen should indicate that the plugin has been setup
- Scroll to the bottom of the page and click “Complete Setup without Upgrading”
- You will be redirected back to your site and setup will be complete
Step 5: Ensure that Google Analytics is Properly Tracking
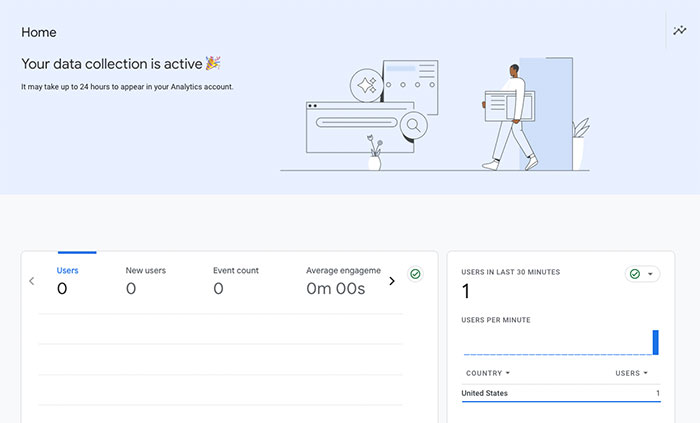
- In Google Analytics, navigate to the property you just setup
- Under the “Home” tab, you will see some high-level user engagement data
- If Google is setup and reporting properly, you will see a number listed under “Users In Last 30 Minutes”
Note: It will take some time for site traffic to be reported back to Google Analytics. If you do not see any visitor data immediately, please check back in about 30 minutes.