Operating Instructions
Powering up the room AV system
- Start the system by touching the [Power] button at the center of the touch panel.
- This powers on the displays and puts the room into “Presentation mode” by default.
Using Presentation Mode
- In Presentation Mode, the room functions like a standard Smart Classroom.
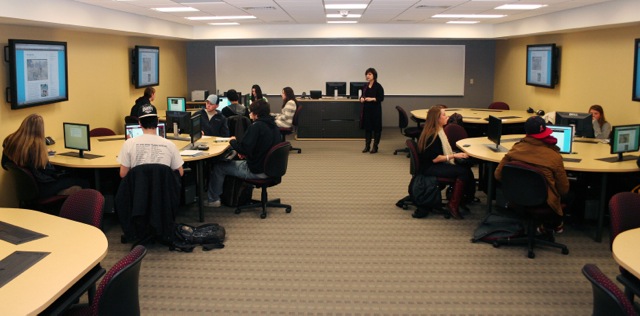
- Selecting one of the source buttons causes that source’s video to be displayed on all six of the LCD table displays.
- There may be a slight delay between pressing the source button and the image appearing on the screens. This is normal operation as the displays synchronize with the video signal.
- Source audio is played through six ceiling speakers, located above each table. Audio (Volume up and down, Mute) can be controlled via the “Volume” controls pane on the left side of the touch panel.
Using the Cynap to wirelessly screencast to the displays
- The Cynap allows for wireless screen sharing from Windows, macOS, iOS, iPadOS, and Android devices.
- Up to four devices can be displayed on the screen at the same time.
- Controls on the touch panel allow for the displayed windows to be resized to full screen or windowed.
- While primarily useful for displaying user devices on the displays, the Cynap can also be used to display any of the student PCs on all the table displays.
To connect a student PC to the Cynap
With the Cynap selected on the touch panel and displayed on the large monitors:
- Press the Windows logo key and the P key simultaneously
- A pop-out window will appear on the right side of the desktop.
- Choose “Connect to a Wireless Display” at the bottom of the list.
- On the next pop-out, choose “Cynap-Pardee-28”
- A text box will appear that says “Enter the PIN for your device”
- Enter the 4-digit PIN number that will now be displayed on the Cynap’s screen.
- Press the [Connect] button on the pop-out screen
Managing Multiple Shared Devices
The Cynap adds a tag to the lower left of the displayed image that has a colored square plus the name of the device connected.
- The first device connected is assigned a red icon, then green, yellow, blue.
- There is a small yellow label on the base of the PC identifying it. (Tables are A-F, PCs are 1-5)
- The first device to connect will be displayed full screen. Any additional connections will cause all displays to be shown in smaller windows.
- From the touch panel, any displayed window can be made full screen by pressing the appropriately colored button labeled [Windowed] on the touch panel. The button will get an outline and the label will change to [Fullscreen]. Pressing it again will toggle the display back to Windowed.
- Pressing any of the other [Windowed] buttons will make that input full screen, replacing any other window that may already be full screen. These windows are layered, so that windowing or closing the second screen will reveal the first screen once again.
- Pressing any of the [Close] buttons on the touch panel will disconnect that device from the Cynap.
- Alternatively, pressing Windows + P on the PC will pop out a window where you can choose “Disconnect.”
To connect a user’s device to the Cynap
- The device must be able to connect to the campus wireless network.
- The Cynap’s home screen describes the methods available for connection dependent on the device’s OS.
- More detailed instructions are available on the help page URL displayed on the screen or by scanning the QR code shown.
Using Breakout Mode
- Breakout Mode can be selected by pressing the [Breakout Mode] button on the right side of the touch panel.
- Switching to Breakout Mode causes the table displays to switch input modes. Once switched, the table displays are independent.
- Select the computer to be displayed by pressing the oval Show Me button on the cable near the base of the computer display.
- The active [Show Me] button will have a blue indicator light around it.
- Exit breakout mode by pressing the [Presentation Mode] button on the touch panel.
Getting Help
- As with other Smart Classrooms, help is available in several ways.
- For issues that do no require immediate action, click the “Report a Classroom Problem” link on the PC desktop and complete the short form.
- For issues requiring immediate attention, press the [Help] button on the lower right of the touch panel and follow the prompts. This will dispatch a technician during normal class hours.
- You may also report any issues through the HelpDesk.
Shutting the system down after use
Please turn the system off after use by pressing the red [System Off] button on the lower right corner, and then the green [Power Down] button on the confirmation pop-up window.
