Lafayette CollegeTechnology Help
Linking to the College Catalog
College catalog links
Updating Existing Links
The WordPress Codex has excellent instructions documenting how to use the content editor to add, edit, and remove links.
Using the “Courses” template
All of the websites for the College’s academic departments include a “courses” page, most of which include the following information:
- Course Title
- Link to the course entry in the college catalog
- Course description
The “Courses” template in the “Hermione” WordPress theme (available to websites hosted on forge.lafayette.edu) can generate this list automatically. You specify the academic program you’d like to feature, and then the template queries the College catalog for a list of courses associated with that program. It then displays that information on the page, updating it as changes (edits to course descriptions, the addition or deletion of courses, etc.) occur in the College catalog.
REPLACING AN EXISTING “COURSES” PAGE
If you have an existing, hand-crafted courses page that lives at the web address “http://yourdeptname.lafayette.edu/courses”, you will need to rename it before creating your new template-driven “Courses” page. If you don’t, and try to create a new page called “Courses”, the web address for that page will become “http://yourdeptname.lafayette.edu/courses-2”.
- Login to your WordPress site.
- Navigate to your existing courses page.
- Click “Edit Page” link in the black quick links bar at the top of your webpage.
- Beneath the title field for your webpage, there is another field called “Permalink”.
- Click the “Edit” button.
- The “Courses” portion of the web address becomes editable. Rename “courses” to “courses-old”.
- Click the [Update] button to save the page.
Note: Doing this will break any “Courses” links on your website, but we’ll quickly fix that by creating the new “Courses” page.
CREATING A NEW “COURSES” PAGE
- Login to your WordPress site
- Create a new page. You can do this one of two ways:
- Choosing “New > Page” from the black quick links bar at the top of your website
- Going to your website’s Dashboard, clicking on “Pages” in the left-hand navigation bar, and clicking “Add new”.
- A new page appears. In the page title field (“Add title” field) type “Courses”. WordPress will automatically create a web address of http://yourdeptname.lafayette.edu/courses
- If the web address ends with /courses-2, then you already have a courses page within your site. See the “Replacing an existing ‘Courses’ page” instructions above.
- On the right side of the page there is a box called “Page Attributes”, which includes a dropdown menu called “Templates”. Click the dropdown menu and choose “Courses”.
- A new page component called “Course Catalog” is added to the page with a section called “Subjects”
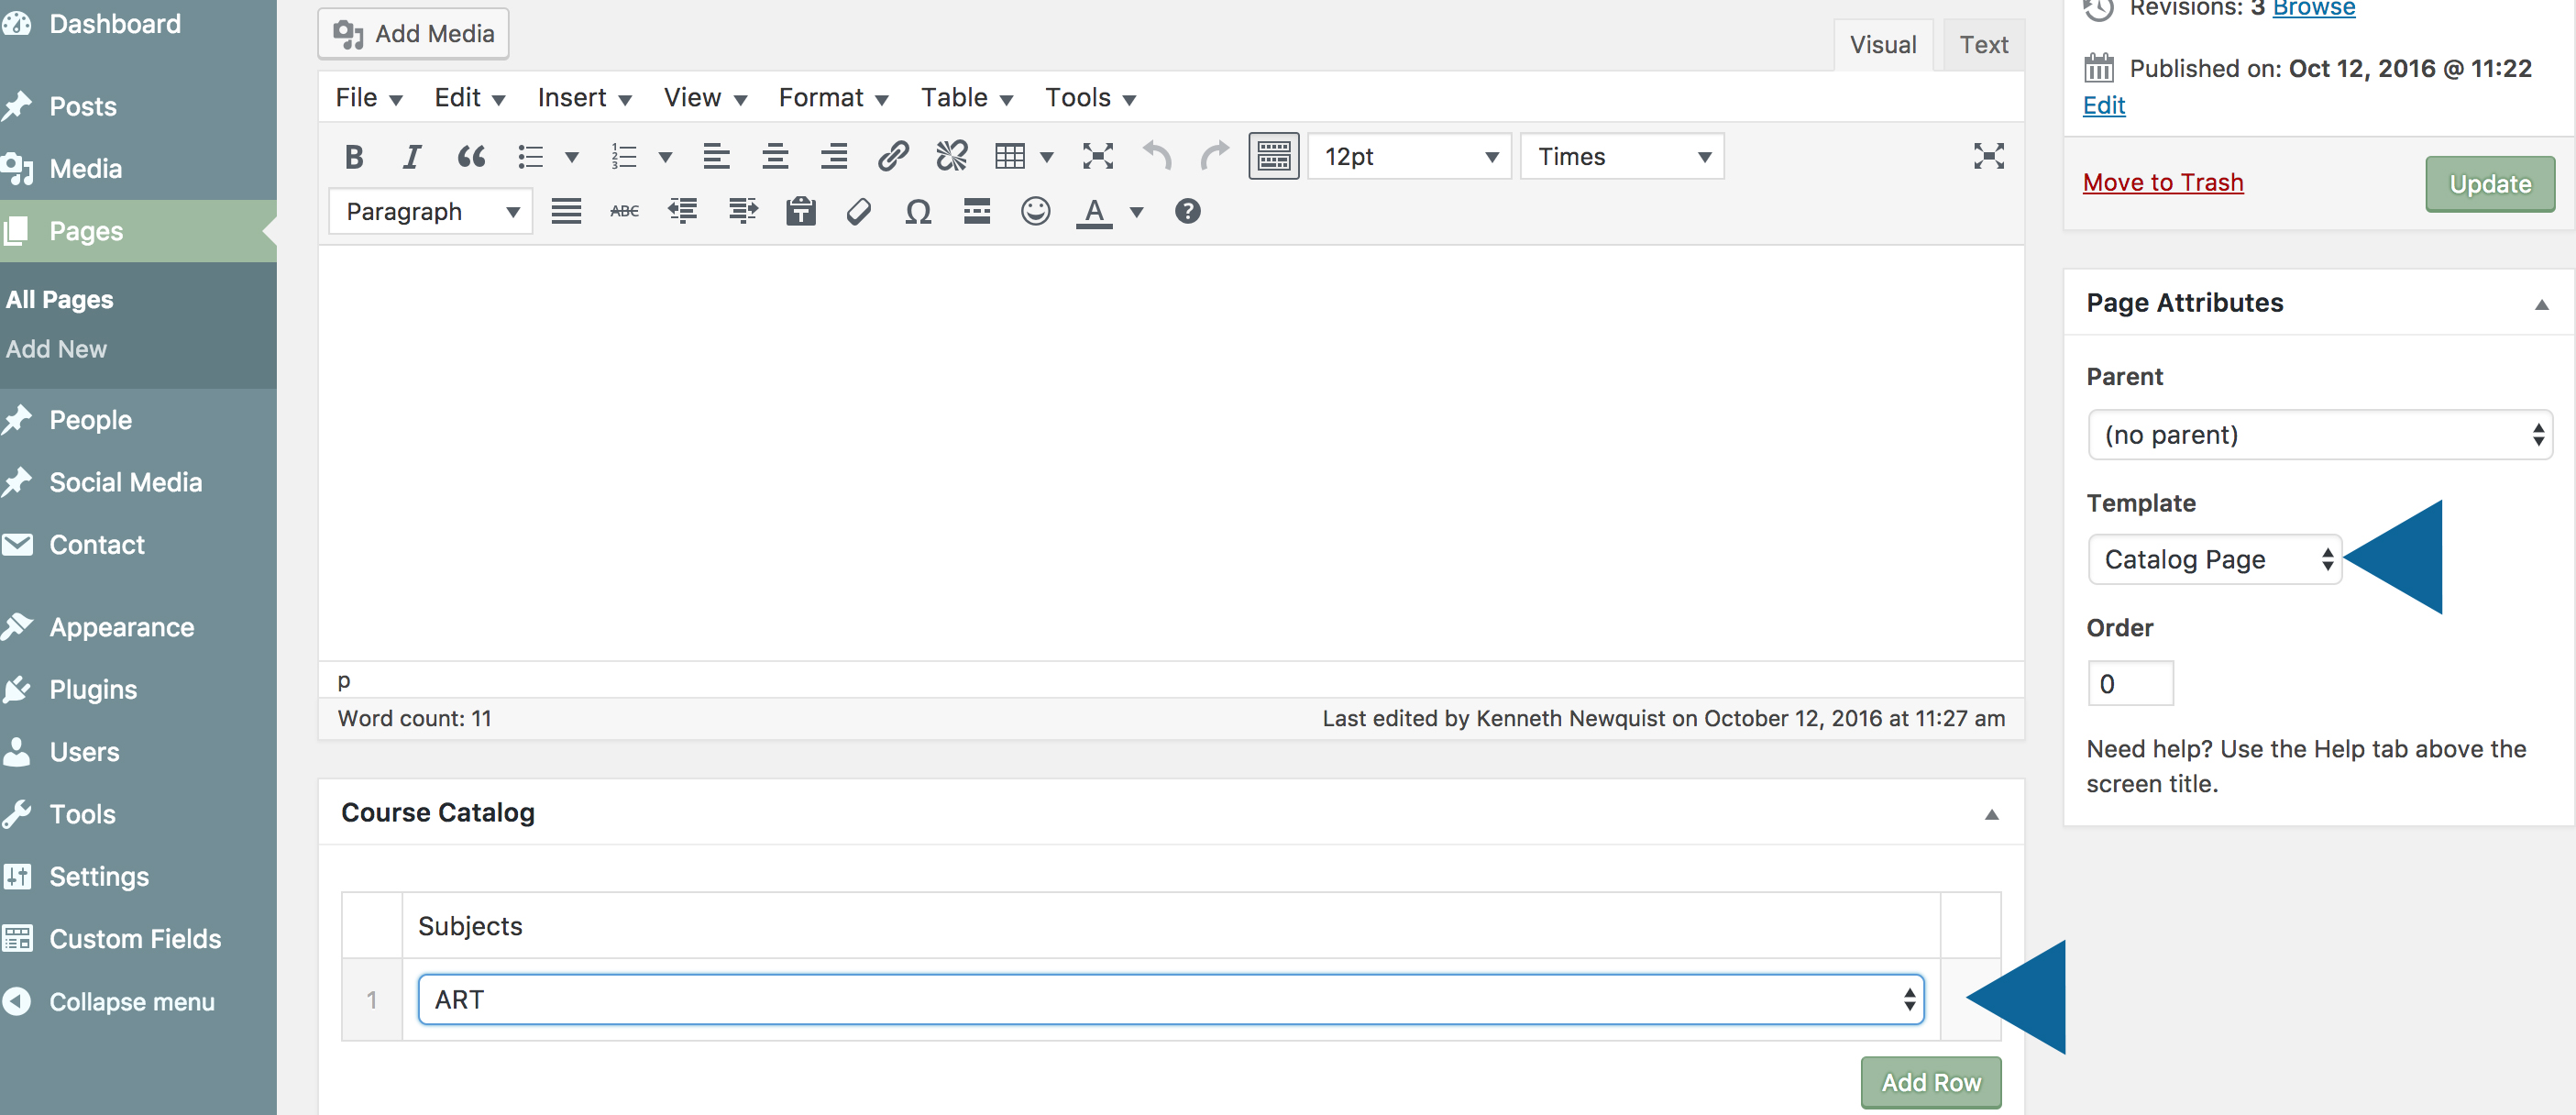
- Click the [Add Row] button. This adds a dropdown menu listing all of the College Catalog’s academic offerings.
- Choose the appropriate academic offering from the dropdown.
- Preview the page by clicking the [Preview] to verify the page looks as you expect.
- Once the page is complete, click the [Publish] button. The page is now complete.
Adding another academic offering: You can have multiple academic offerings to a page. To do so, click the [Add Row] button under “Course Catalog” when editing the page, then choose the second academic offering you’d like to add. Each section will be separated by the title of that offering.
Adding text: The open-ended text field below the page title field can be used to add supplemental text to the page.