Lafayette CollegeTechnology Help
WordPress Galleries
How to add WordPress galleries


Step 1: Place your cursor
A gallery can be inserted onto a page or post by itself, or above, below, or in the midst of text.
- Place the cursor where you want the gallery to appear. If you want the gallery to display in between blocks of text, place a return in between the lines of text so the gallery appears on its own line.
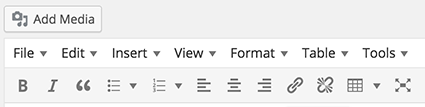
Step 2: Click the [Add Media] button
- With the cursor where you want the image gallery to appear, click the [Add Media] button located above the web editing toolbar.
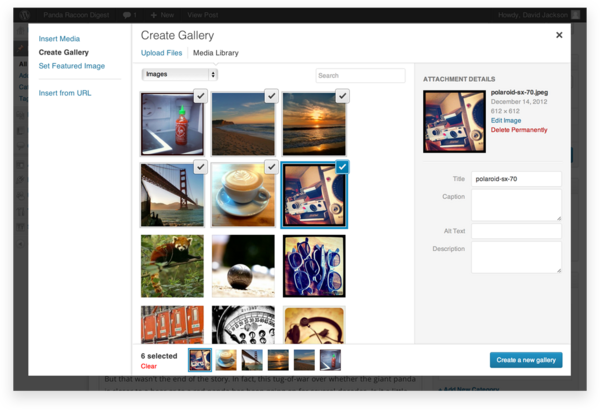
- In the pop-up window, click the [Create a Gallery] option from the list on the left.
Step 3: Add the images to the gallery
- Add the images you want to include in your image gallery by uploading them through the [Upload Images] tab or selecting images from the [Media Library] tab.
- The Upload Images tab allows you to add images by dragging them into the upload area from your computer. You can add more than one image, and they will be automatically grouped together as an image gallery.
- The Media Library tab allows you to select images from your site’s Media Library. You will see a checkbox displayed next to the selected images
- When you are happy with your selection, click the [Create a new gallery] button.
Images added are confirmed with a checkbox displayed in the upper-right corner of each image. Additionally, a row of thumbnails appears at the bottom of the window, displaying the selected images.
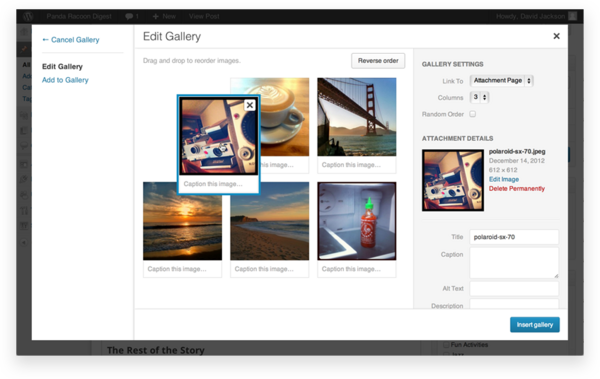
Step 4 (optional): Edit the gallery
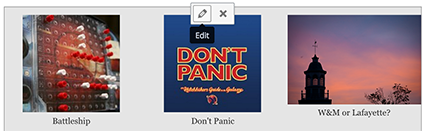
To edit a gallery, click the gallery within a page, then click the pencil icon.
On the Edit Gallery page, you can do the following:
- Add descriptions: Click under an image to enter an image description.
- Rearrange images: Drag and drop image thumbnails to rearrange the order of images in your gallery.
- Reverse order: Click the Reverse Order button to reverse the display of the gallery images.
- Remove images: Hover over an image and click on the “X” to remove any of the images.
- Add more images: Click the [Add more Gallery] button on the left to add more images to the gallery.
- Links To (located in the right column): Select an image to control if its thumbnail links to an image attachment page or directly to the image only. The default setting for Lafayette College WordPress themes is set to the attachment page.
- Columns (located in the right column): Set the number of columns–read as the number of thumbnails across–for which the gallery should display. The default setting is 3.
- Random Order (located in the right column): Enables your gallery to display your image thumbnails in a random order each time they are viewed on the site.
- Size (located in the right column): Set the initial gallery images to Thumbnail, Medium, Large, or Full Size. The default setting is Thumbnail.